Please select a topic of interest to watch the video
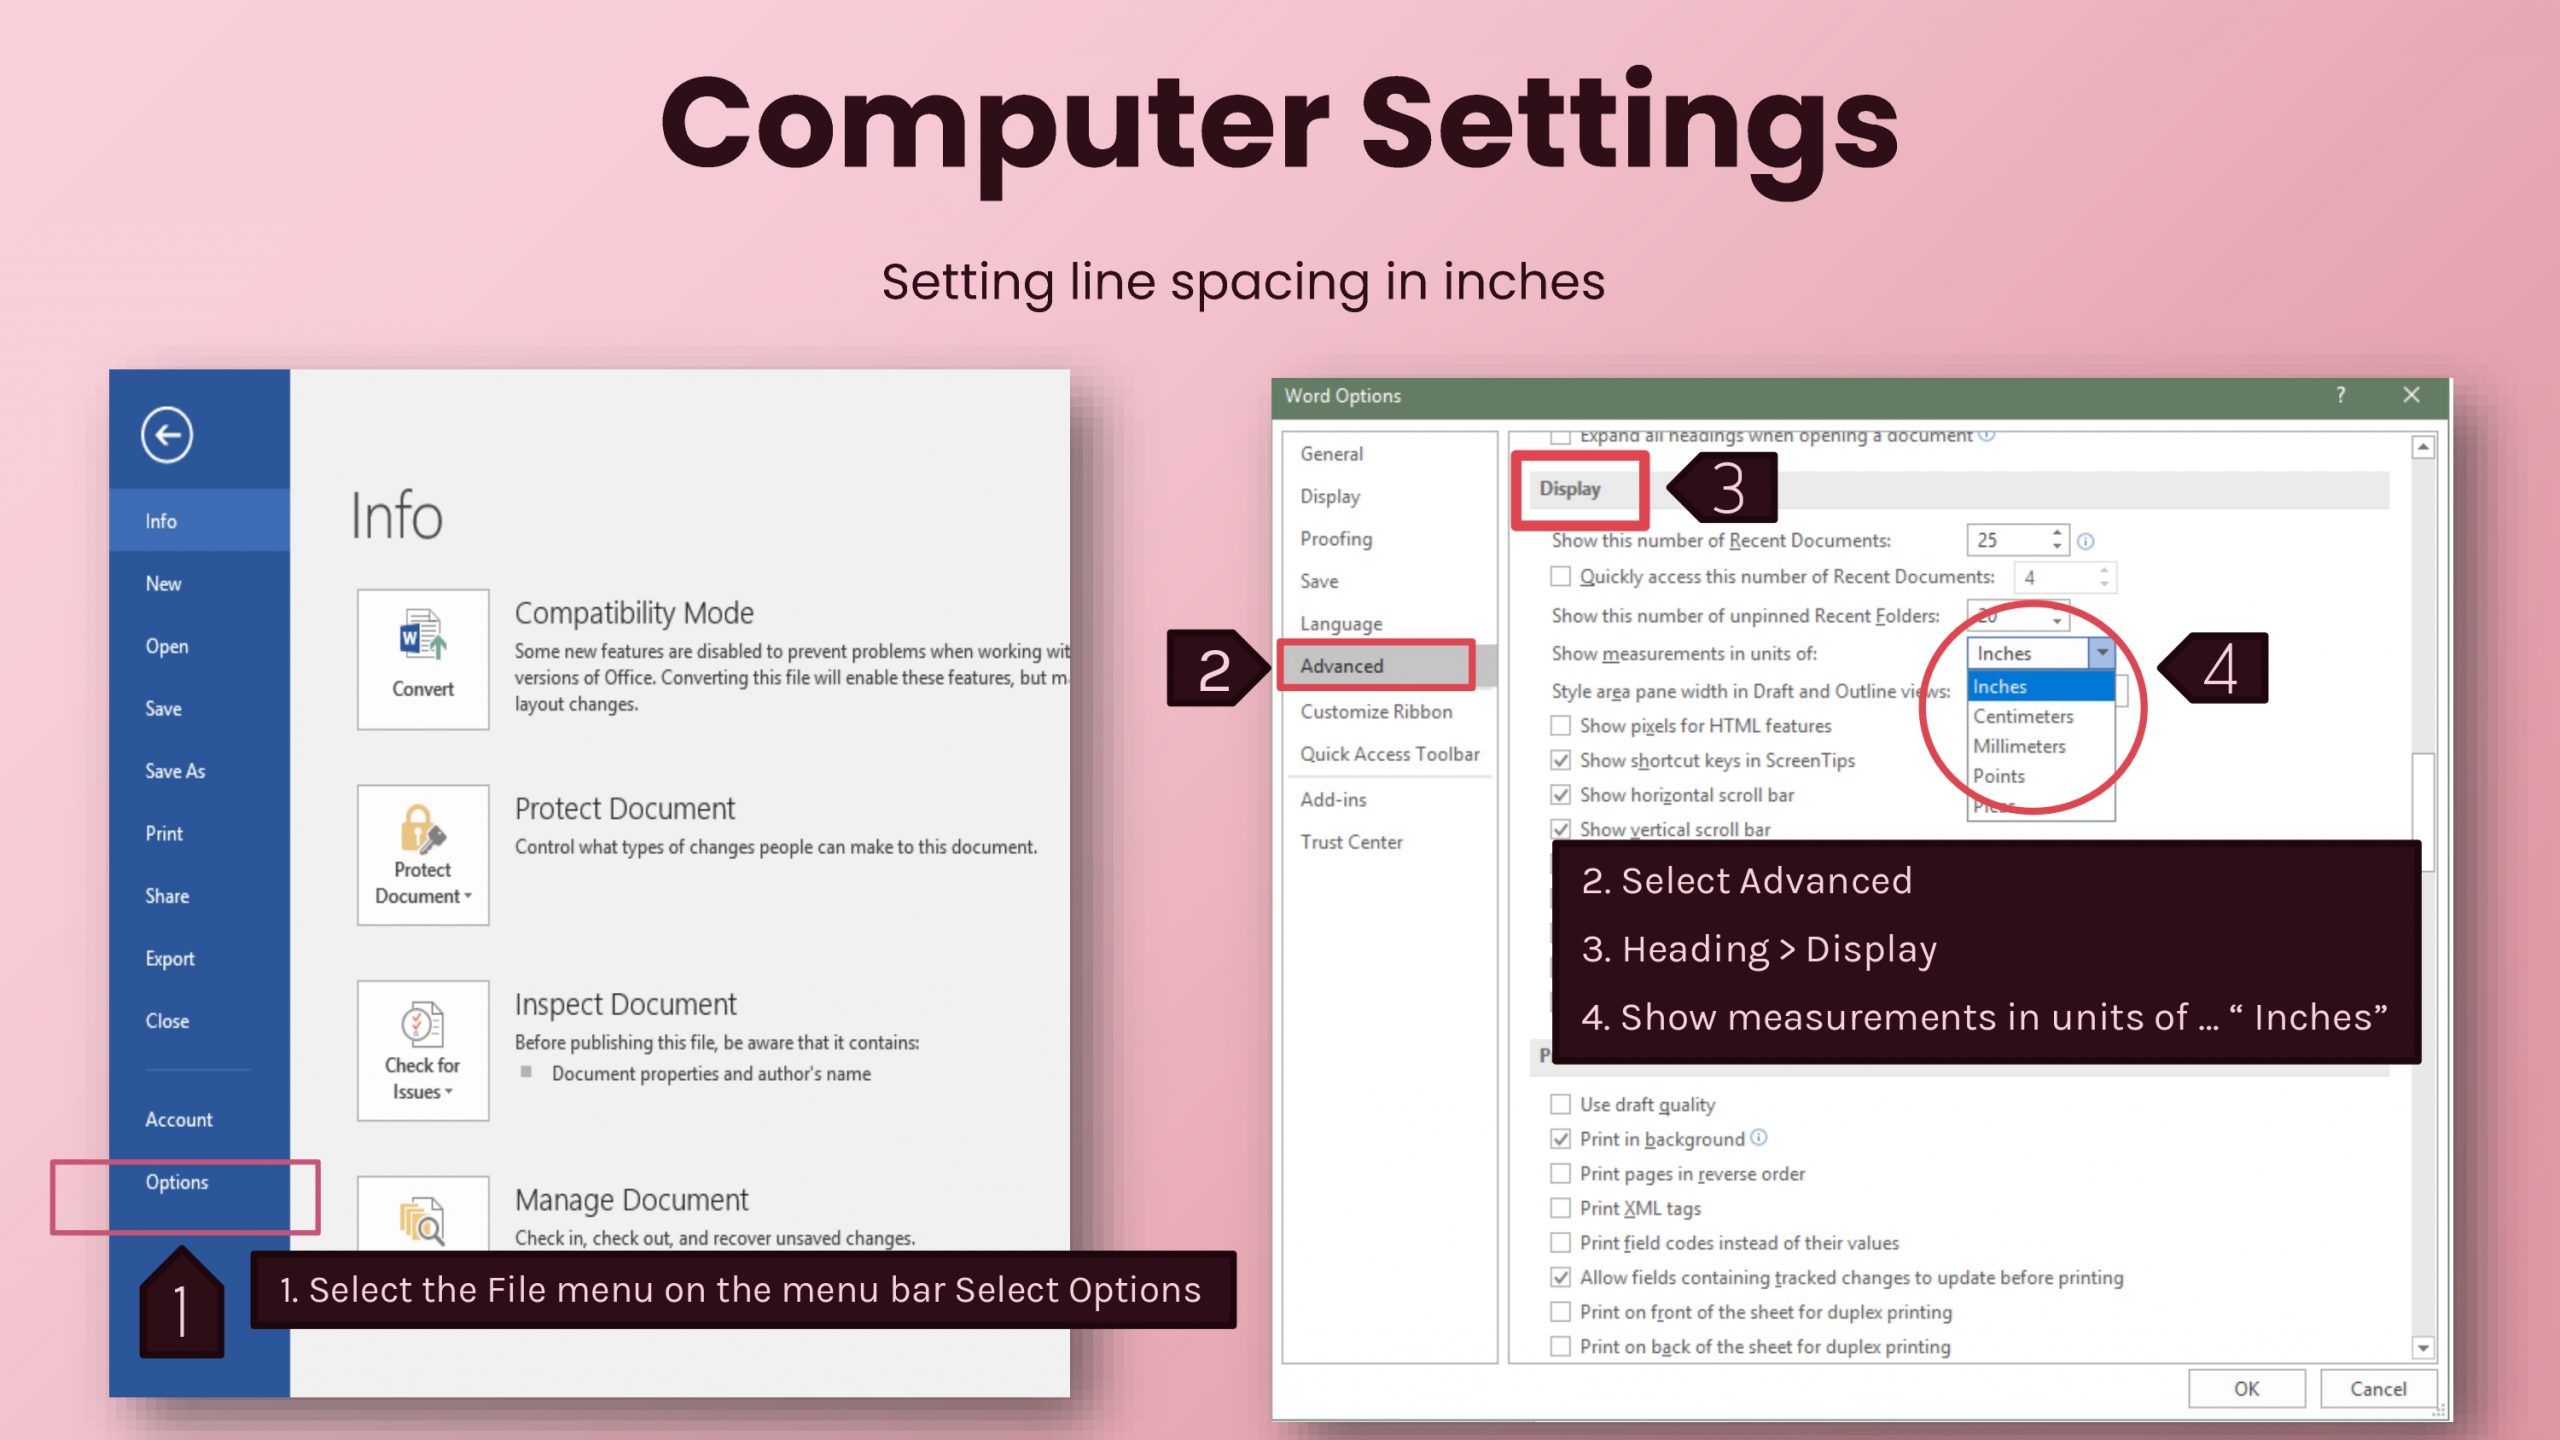
In preparing the research book, the university has specified that the measurement value is in inches. On some students’ equipment, there may be centimeters or other measures.
Students can change the measurement by selecting the File menu on the menu bar, selecting Options, then selecting Advanced, scrolling to the Display section, selecting Show measurements in units of …, changing it to inches, and pressing OK.
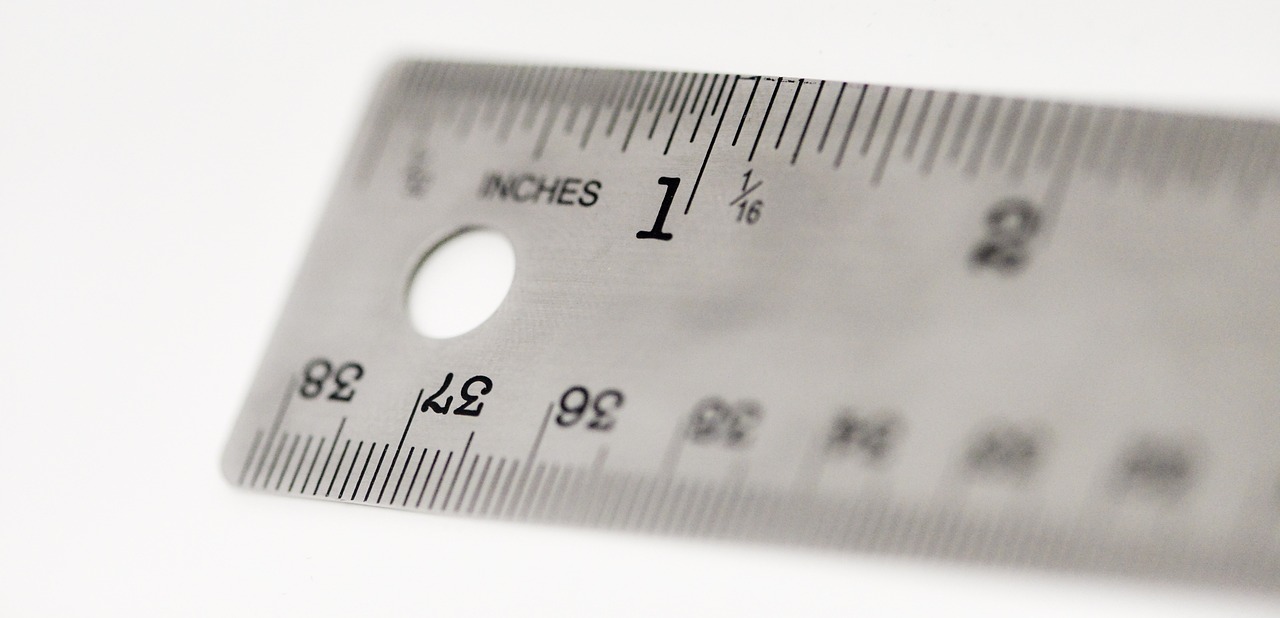
You can observe the changes in measurements from the ruler. Students who do not have a ruler yet should be selected on the View menu, then click and check the word ruler. A ruler will appear above and on the side of the edge of the paper.
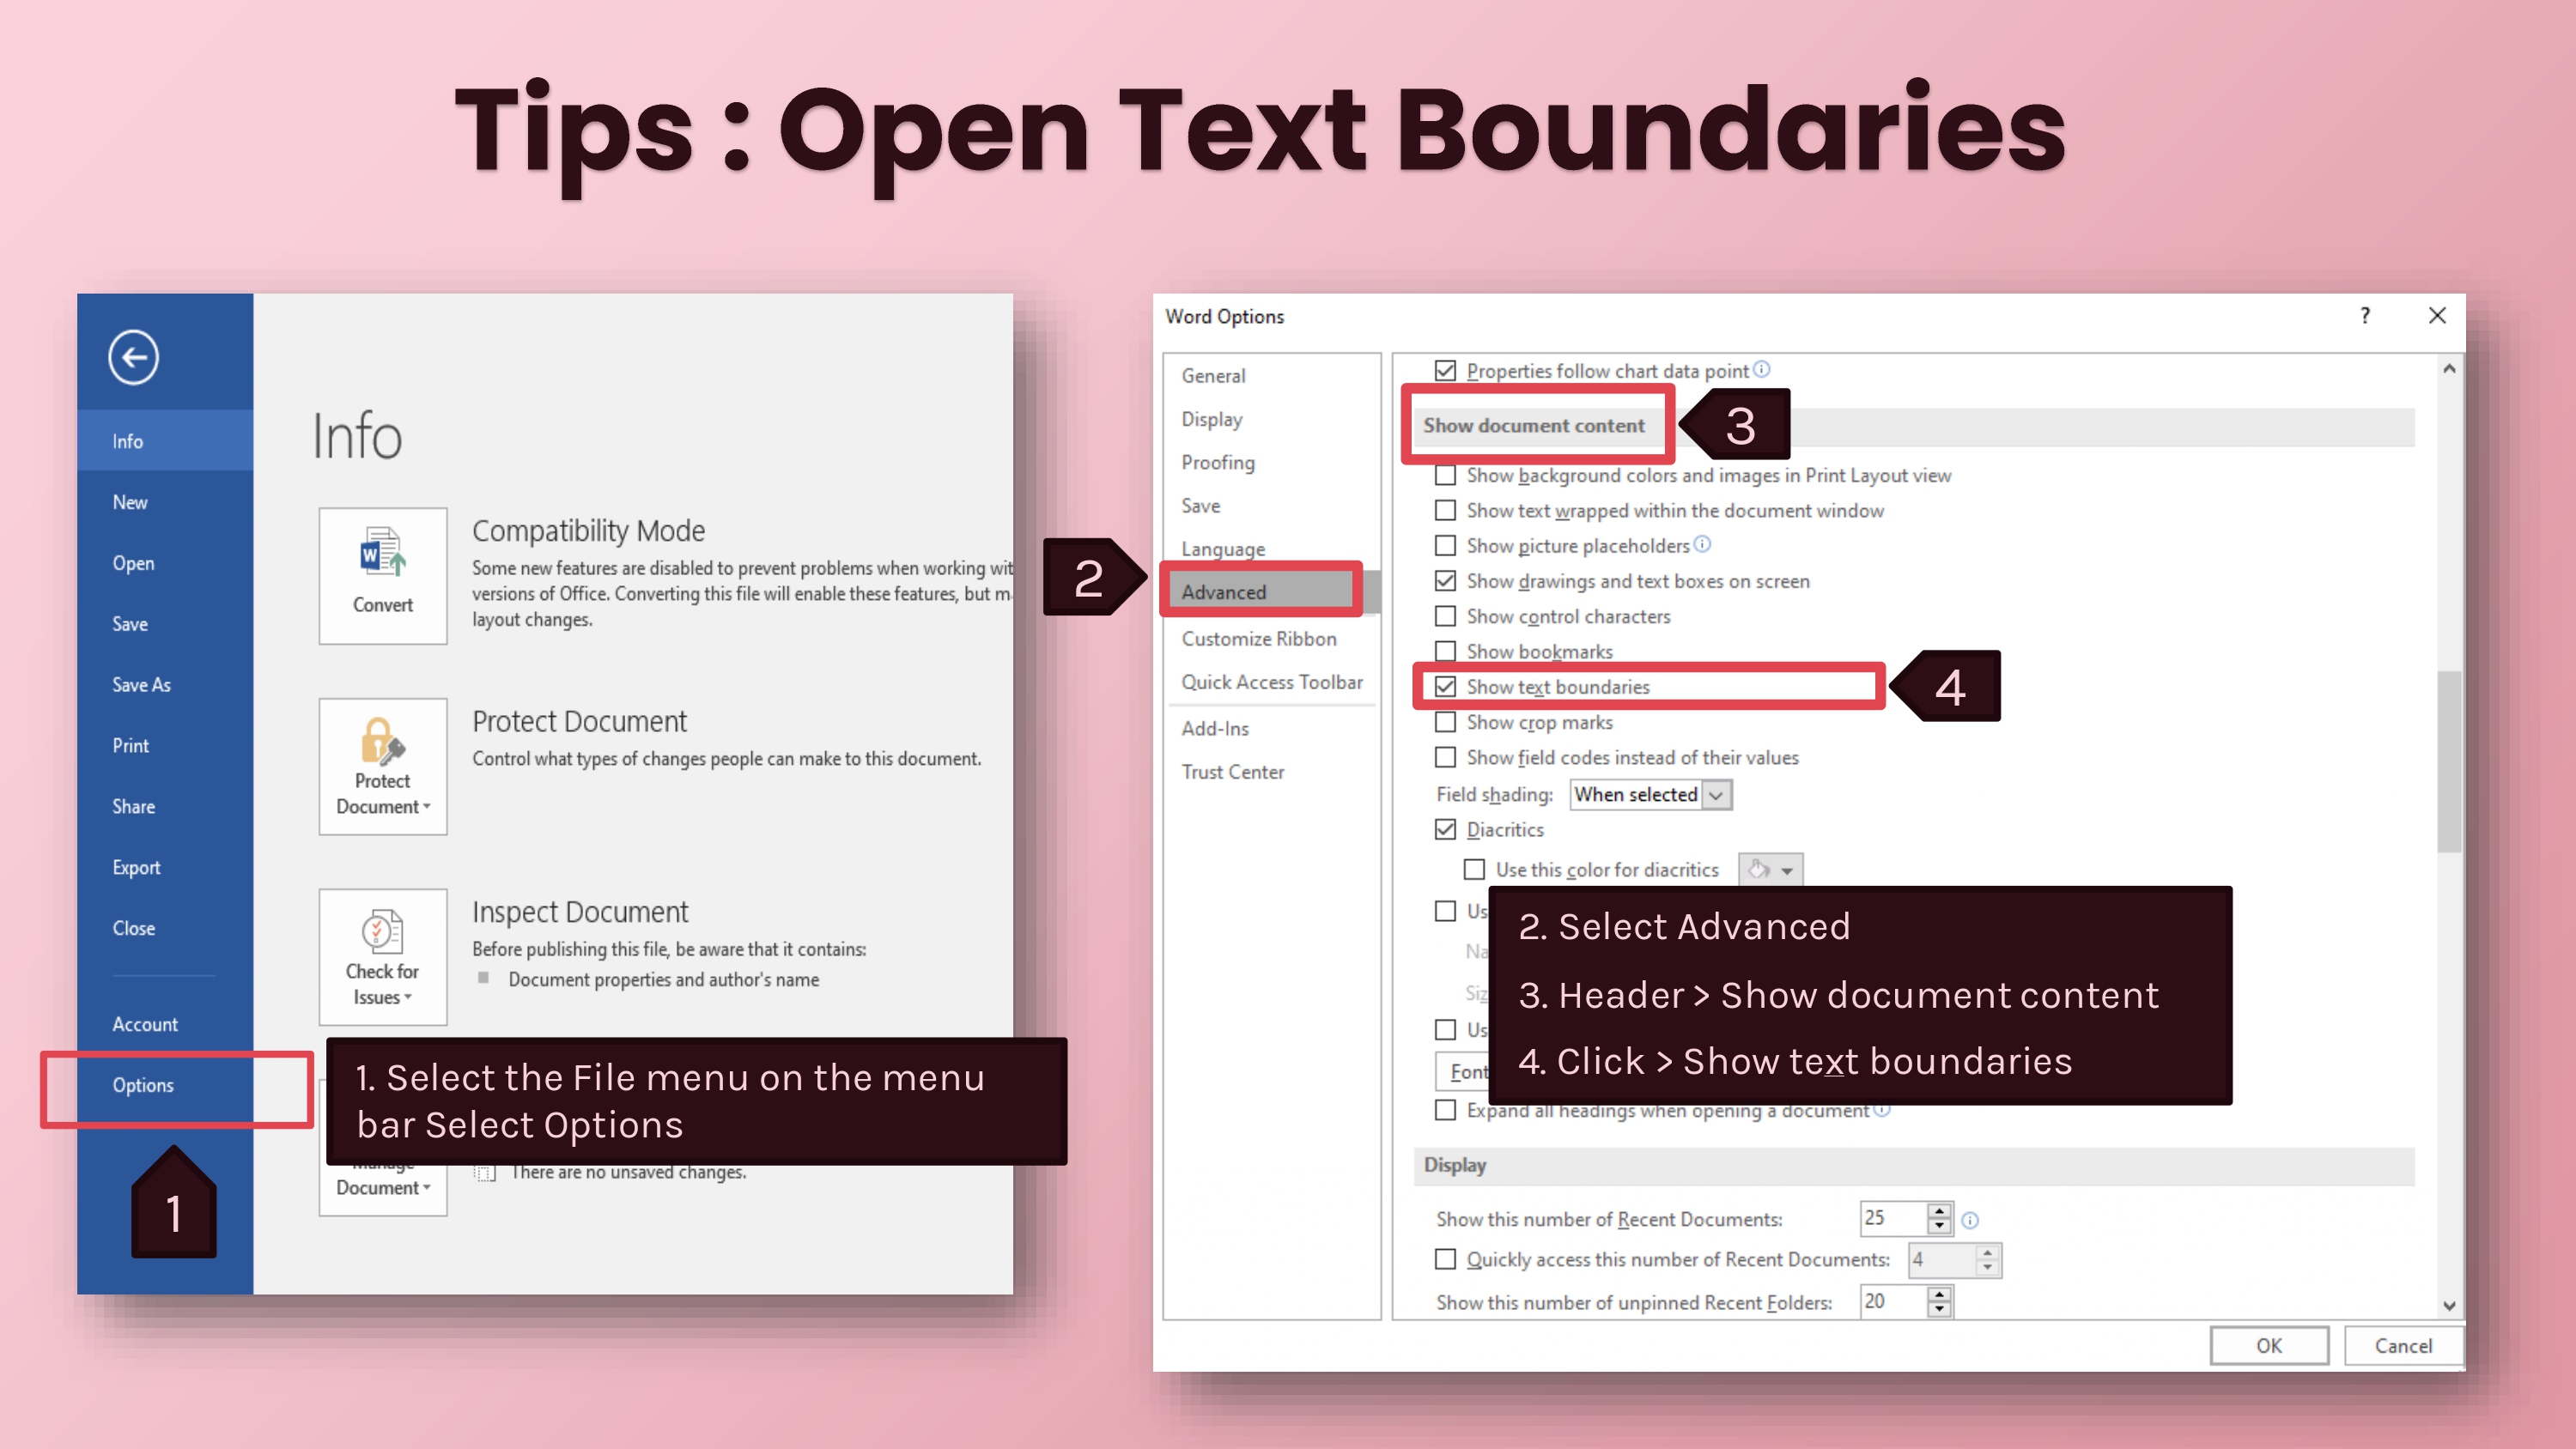
Turning on these lines will greatly help with formatting. This way you can see the size of the line spacing. Which depends on each person’s aptitude, some people may be dizzy and can turn it off by selecting the File menu on the menu bar, selecting Options, then selecting the Advanced menu, scrolling to the Show documents content, and selecting Show text Boundaries.

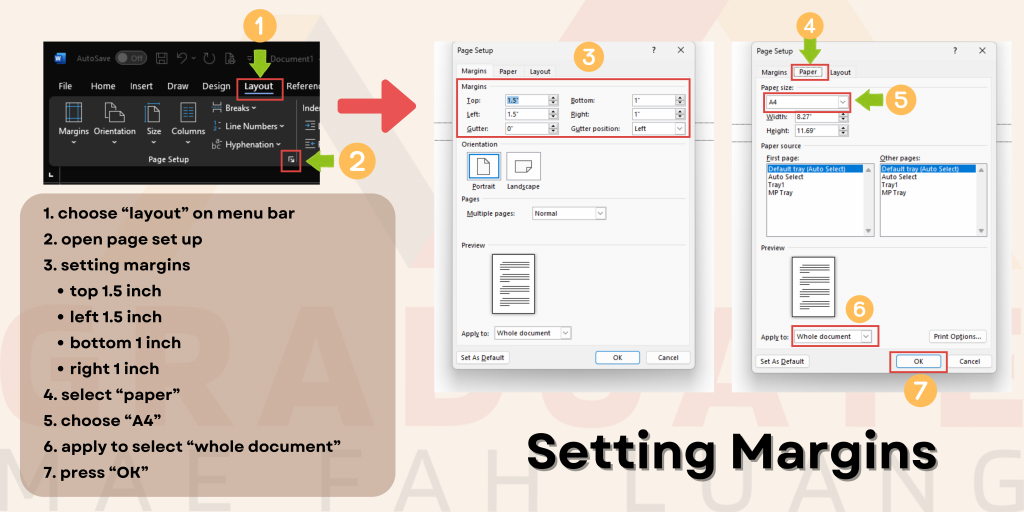
Page setup in all preliminaries parts, including the cover page through to the last table of contents. The top margins are 2 inches overall, 1.5 inches on the left, 1 inch on the right, and 1.5 inches on the bottom.
How to set up: Select the layout menu, open the page setup from the symbol in the lower right corner, and set up the page as specified.
Then select the paper menu to set the page size to A4, then select apply to the whole document and press set as default.
Normally, tables are arranged vertically. The university does not specify the font size. You can reduce the font size in tables as appropriate, so as not to make the contents of the table too small or unreadable. If you have a lot of data in a table format and can’t fit it on a vertical page or extend beyond the edges of the page, you can create landscape pages.
How to set up: Select the part where you want to make the landscape page
> select the layout menu > open the page setup window from the symbol in the lower right corner
> select Landscape from the orientation menu
> select the selected text and press ok
You will get a landscape page.
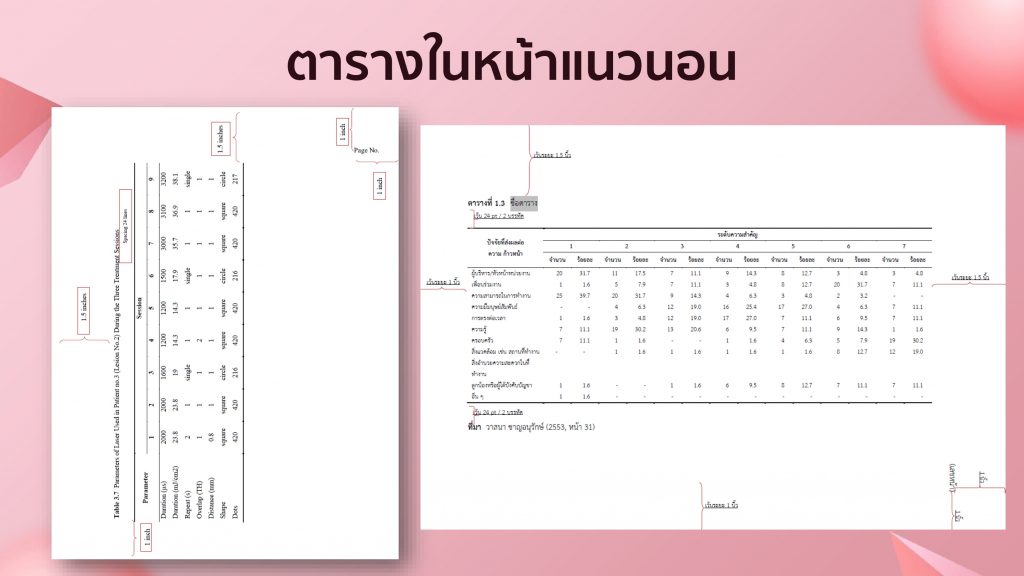
Because the research book will be transferred to the library as an E-book, the landscape pages must be portrait as shown in the example. This will require you to adjust the margins in the same direction, meaning you will need to adjust the margins on the landscape pages to be 1.5 inches on top (the same as the left side of a portrait page) and 1 inch left (the same as the bottom of a portrait page) 1.5 inches right (same as the top of a portrait page) and 1-inch bottom (same as the right side of a portrait page) as shown in the example to be correct.
Page numbering in the content section starts from the page of Chapter 1 until the last page of the book. To insert page numbers
> click on the insert menu
> select page number
> select Top of page
> select pain number 3
Page numbers will be added to the far right of the top of the page and edit the font of all page numbers to the font specified.

Horizontal page numbering is not commonly used because creating horizontal pages in an E-book format is quite complicated. If you need to create a landscape page
> click on the insert menu
> select the Text box
> enter page numbers
> edit the font of the page numbers to the font specified
> double click on the text box
> adjust the format Height 1 inch and Width 1.2 inches
> drag the frame to the bottom right corner until it’s parallel to the corner
> press the Text direction and select rotate all text 90 degrees
> press enter above the page number until the page number is at the edge of the frame. If it doesn’t go all the way to the edge, add a paragraph before about 18 pt until it goes all the way down
> press shape fill
> select no fill
> press shape outline
> select no outline, and you’re done.
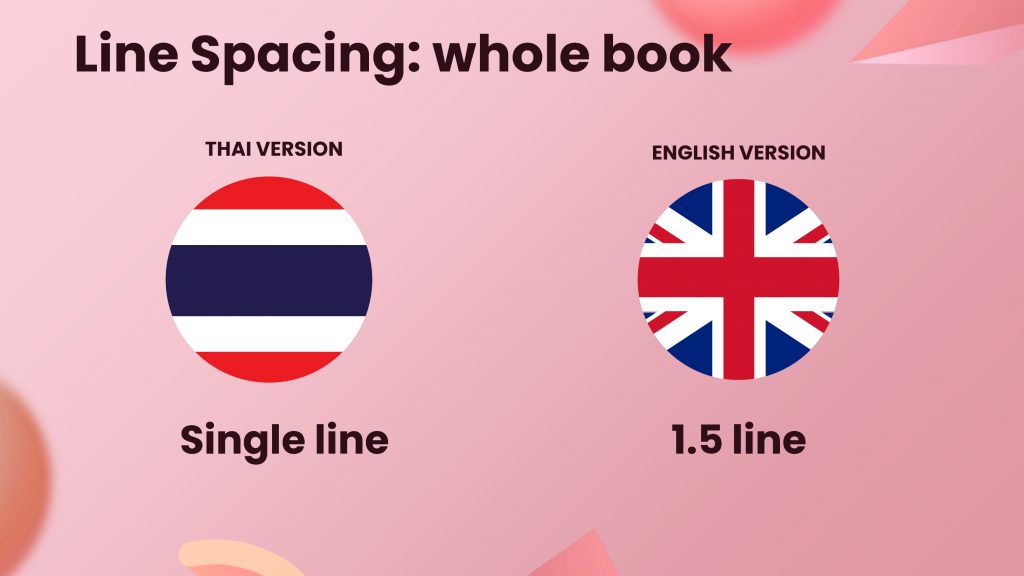
For Thai books, use font TH Sarabun New and use single line spacing throughout the book. English books use font Times New Roman and use 1.5 line spacing throughout the book.
Check and set by pressing Ctrl+A, right-click, selecting paragraph, selecting Single for Thai volumes, or pressing 1.5 lines for English volumes, pressing OK.
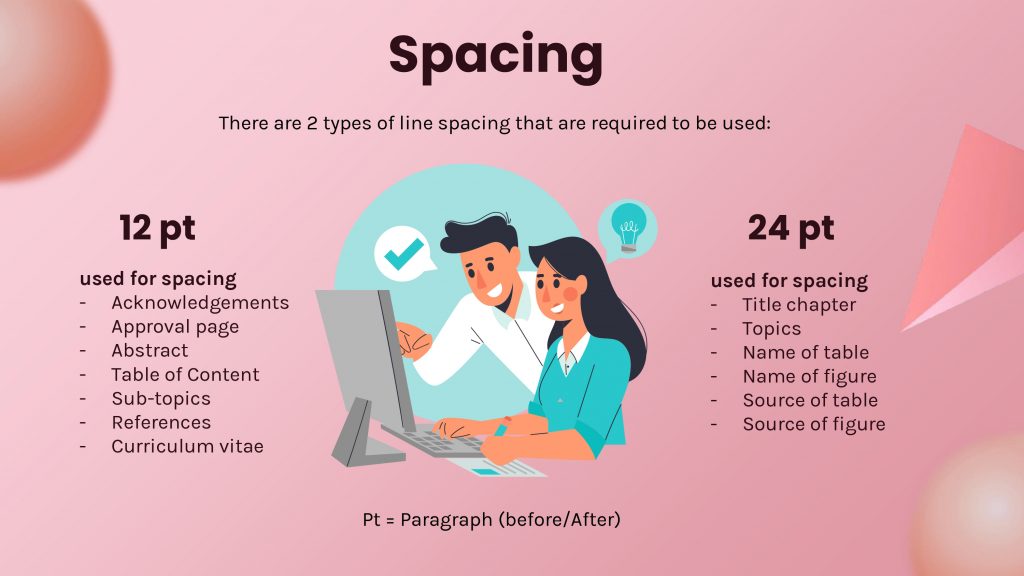
There are only two types of line spacing: 12 pt, known as one line spacing, and 24 pt, known as two line spacing. Paragraph spacing is not the same as pressing enter on the line.
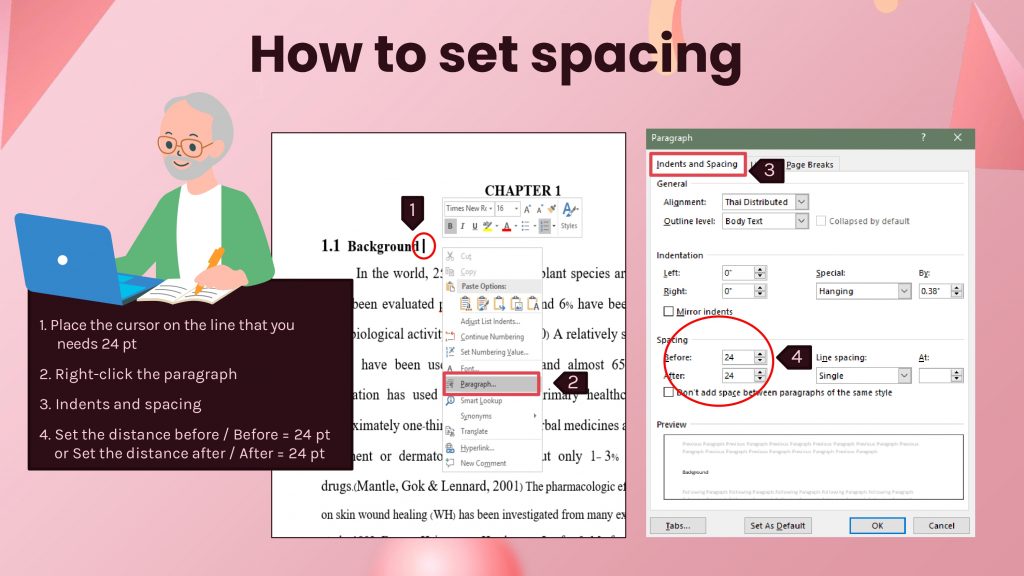
Spacing: placing the cursor on the desired line to be spaced. Right-click and select the paragraph. Choose the number 12 or 24 as desired, as in the example. The sub-topic must be spaced out from the content above and the cursor must be placed on that line. You will need to space it before by 12 pt as in the example.
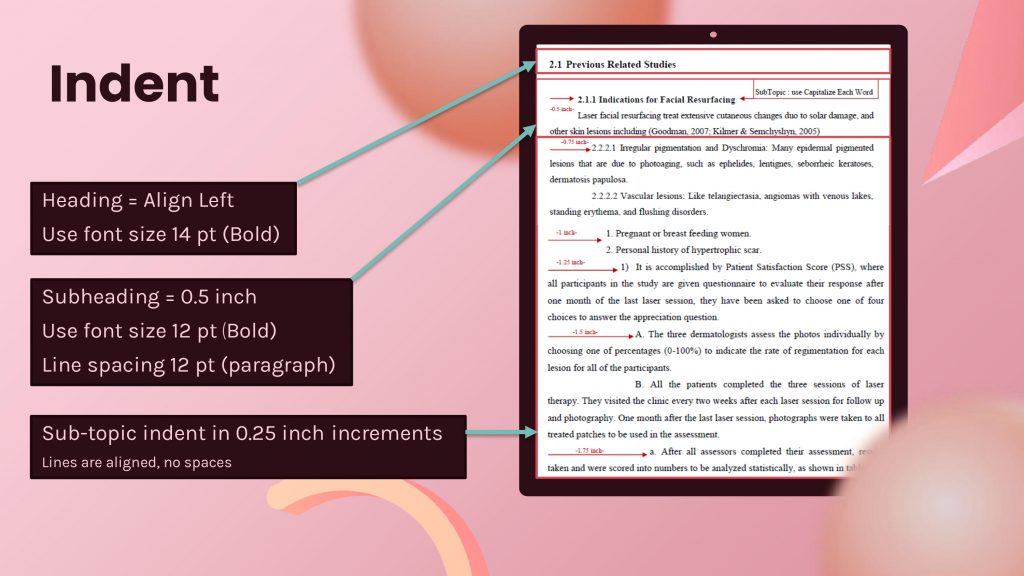
The university has defined indentation by starting with main headings, such as 1.1 or 1.2, aligned to the left and using bold font.
**The Thai book used font size 18 and the English book used font size 14.
Next is a secondary topic, such as 1.1.1 or 2.1.1, keep the paragraph or TAB at 0.5 inches. Use bold text only as headings, with 12-point spacing from other headings.
If it is the content of the entire sentence, use normal letters, no need to use bold letters and no spaces. Use normal letters according to the general format of the content.
Next is the subtopic, with the topic sequence next to 1.1.1 being 1.1.1.1 or 2.1.1.1 indented 0.75 inches.
1. Indent 1 inch.
1) Indent 1.25 inches
A. Indent 1.5 inches.
a) Indent 75 inches
You will notice that the paragraphs will increase in increments of 0.25 inches.
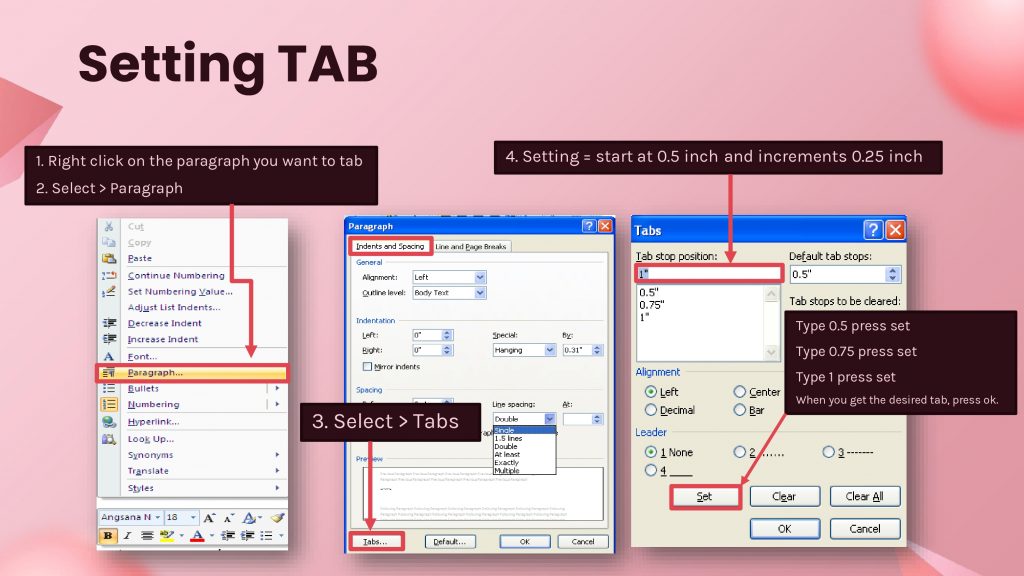
The indent must be in the settings tab.
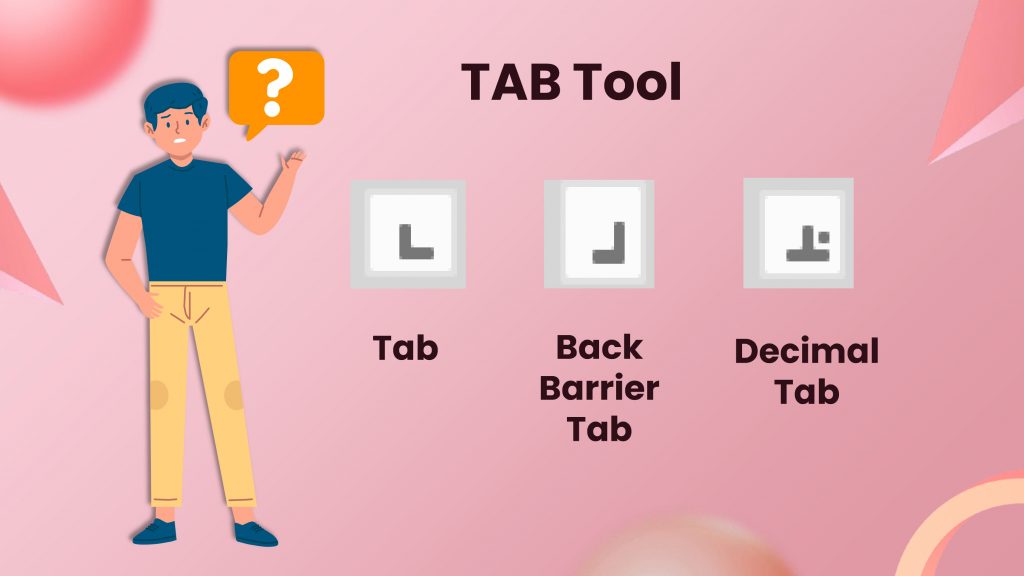
There are 3 types of TAB: Front Tab, Back Tab, and Decimal Tab. You can observe the symbols from the ruler above.
To set up, press ctrl + A
> right-click, select paragraph
> go to Indents and spacing
> at the bottom, there will be the word “Tabs”
> When opened, there may be numbers. If there are numbers, press clear all, then type the specified numbers, starting at 0.5, then press set, and enter the numbers as specified. If there aren’t many topics in the chapter that require indenting, enter as much indentation as you want, press OK, then look at the ruler and there will be a line at the top. It is considered that the Tab setting is complete.
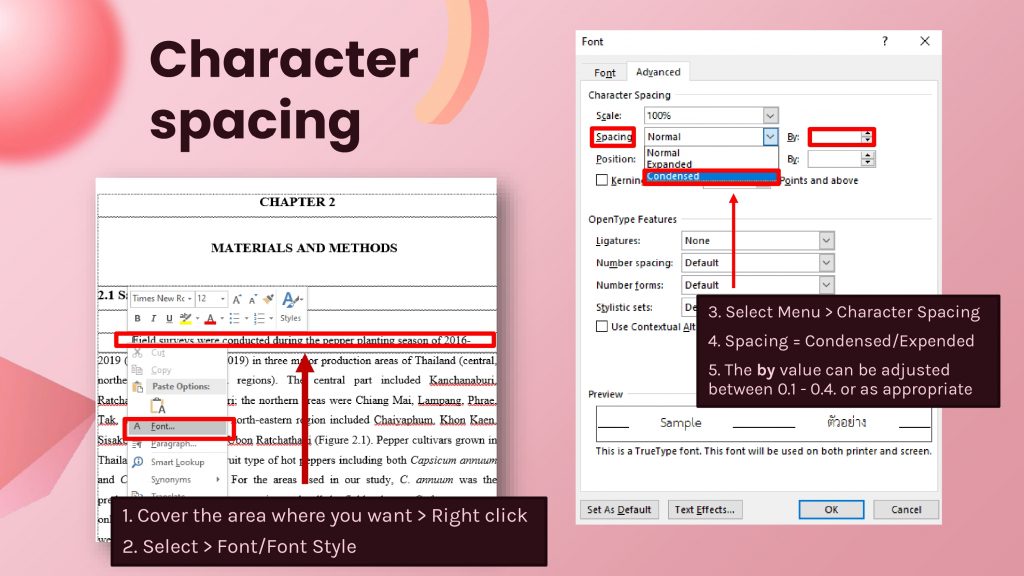
Sometimes when you’re formatting content there might be a word with too much space on a line or the committee might suggest reducing the space between letters.
You can make it even and beautiful by condensing or expanding the spacing. The way to adjust the format is to drag to select the point where you want to reduce or increase the distance.
> Right-click, select font
> select the advance menu
> go to the character spacing topic, then go to the Spacing topic
> select condensed when you want to reduce the spacing, or select expanded when you want to increase the spacing
> adjust the spacing at “By” on the right. The most suitable spacing is 0.2-0.4. You can adjust it as appropriate.

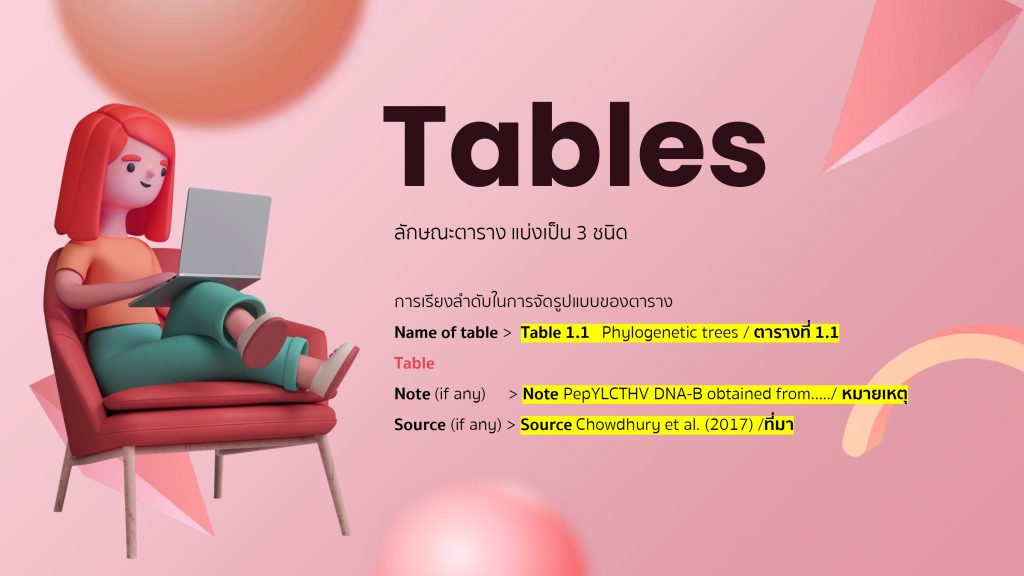
The university specifies only 3 types of schedules:
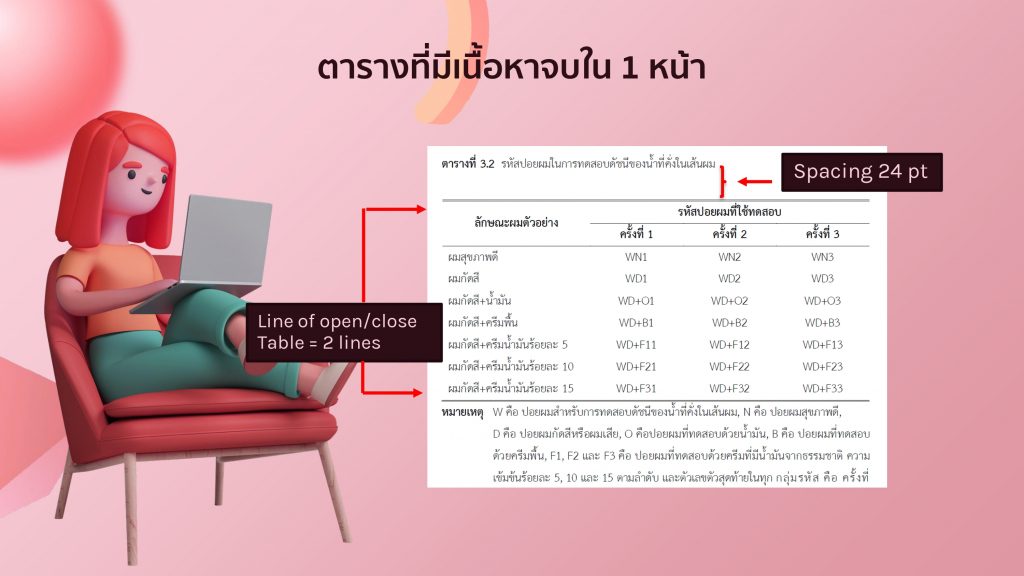
1. A table with content completed on one page is a table with content that can be arranged on one page, including the table name, table content, and table extensions such as notes or sources.
There are 2 double lines at the beginning of the table, 1 straight line between the headings, and 2 double lines at the end of the table. There must not be any other lines other than those mentioned within the table. Whether it’s a straight line or horizontal lines other than those specified the table topic must be centered and the content within the table must be aligned to automatically separate the topics. The table must fill the entire page, both left and right, but must not exceed the margins.
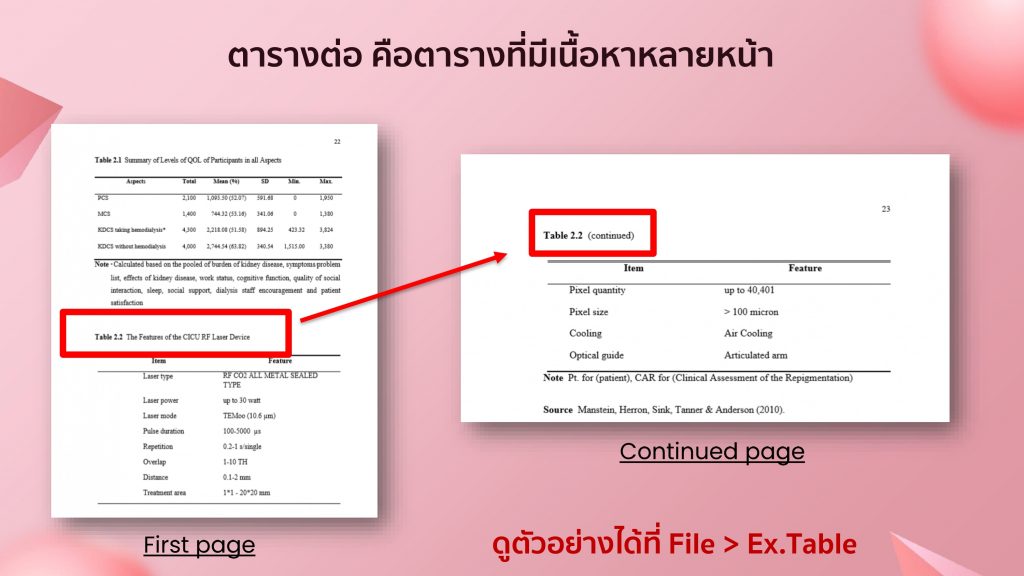
2. A continued table is a table that has so much content that it cannot fit on a single page. The first page of a table has the full name of the table, and its contents, separated by a single line to indicate that there will be more tables on the next page. The next section must begin with the table number but not the full name. Always include the word continued in parentheses followed by the table header before continuing with the content. If the table has complete content, end the table with two double closing lines to indicate the end of the table and add extensions such as notes or sources to the table on the last page.
3. Table on a horizontal page in a format like the tables in 1 and 2, but on a horizontal page.
All three tables must be formatted in the correct order starting with the table name, space the top and bottom lines of the table 24 pt as required to continue with the table. If there are notes to appear before coming, align them with the table without any spacing. The source is next to the note with the same 24 pt space above and below.

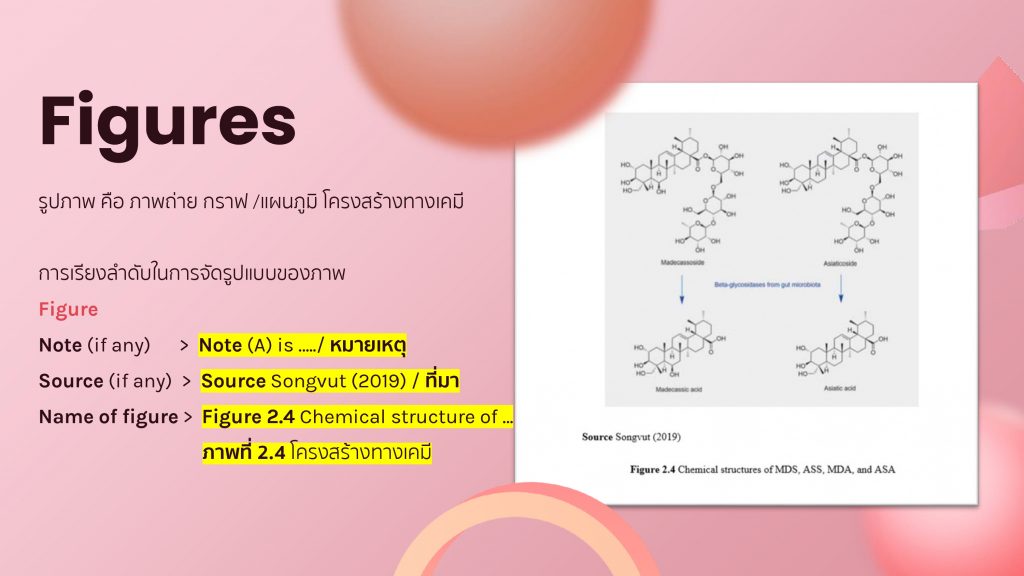
The figures in the research book that the university requires to be identified as images are photographs, graphs, charts, and chemical structures. Figures must not exceed the margins of the paper but can be smaller than the margins. To format the image, spacing 24 pt before the figure. Next, add extensions such as notes and sources (if any). If there are notes, type them on top of the source and align them under the figure. The source is next to the note with 24 pt space before and after, write the figure name and 24 pt space after, and write the next content.